For my first device review, I decided to write about the Nintendo Switch. The Switch (not to be confused with buttons), is a newish console released by Nintendo. It feels like a cross between the Nintendo DS and the Nintendo Wii. For example, a variety of games such as Super Mario Bros. U Delux and Pokémon can be played using the traditional handheld setup (similar to the DS) or by docking the device. Active games like 1-2 Switch can be played by docking the console or by propping the console on a table and removing the controllers (Joy-Cons) from the device. The versatility of the Switch allows gamers to purchase and play the Nintendo games they have come to love all on one device!
Accessibility
Nintendo provides a few adjustable features to help with accessibility which include screen brightness, zoom, controller vibrations (off/on), changing the grip, and button mapping. As of this date, there does not appear to be a way to make actual font size larger, but screen brightness and zoom might be helpful for someone who is visually impaired. For someone who might be deaf or hard of hearing, the vibration feature on the controller can help the player interpret output from the game. However, the vibration feature can be turned off for someone who may not tolerate the sensory input. Lastly, Nintendo has added features to allow grip changes and button mapping for the Joy-Con controllers, which allows for unique game set ups and/or one-handed gameplay depending on the gamer’s needs and wants.
Why do you need to remap you Joy-Con?
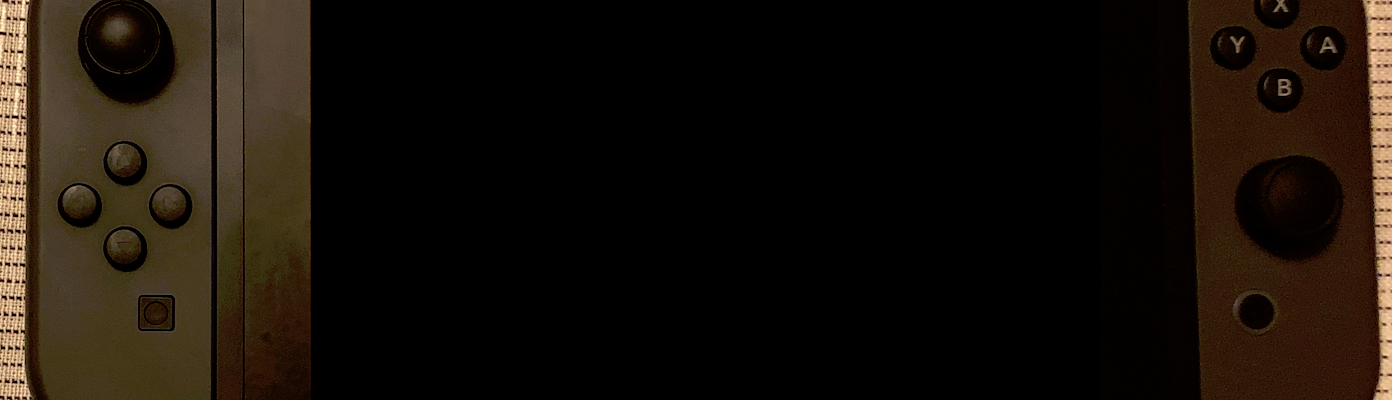
One of the great features Switches offer is they come with a pair of controllers (Joy-Cons). The Joy-Cons are meant to be used together, but the grip configuration can be changed so they can be used separately (this allows two gamers to play a game with one set of controllers). When you first change the grip order to use the controllers separately, the system automatically reconfigures the controller to a horizontal plane as opposed to vertical plane. This is so you can use both hands to play (see picture below).

However, if you try to play the game with one hand (vertically), the automatic settings for the horizontal Right Joy-Con configuration does not work well. The joystick moves the character in the wrong directions and the traditional A, B, X, & Y buttons are rearranged so that the “A” button is on top as opposed to on the right side of the controller (see picture below).

How do you remap your Joy-Con?
Honestly, this took me a little while to figure out. I hope the steps below make it a little easier for you to switch to one-handed gameplay!
Step #1: Change the controller configuration:
1. Navigate to the Home Screen
2. Using the joystick, scroll to and select the “controllers” icon at the bottom of the home screen (see picture below).

3. Make sure that your controllers are separated from the device. Hit the “SL” and SR” buttons on the topside of each controller at the same time (see picture below).

4. Press “B” to return to the Home Screen.
Step #2: Navigate to the button mapping settings:
1. Select the “System settings” at the bottom of the home menu (see picture below).

2. Scroll down and select “Controllers and Sensors.”
3. Select “Change Button Mapping.”
4. Select the controller you would like to change – I am changing the Joy-Con (R) (see picture below).

5. Select “Change.”
Step #3: Remap the Controller:
1. Select “Control Stick Settings” at the bottom of the screen (see picture below).

2. Turn “Change orientation” on (see picture below).
This reconfigures the joystick so it can be used in a vertical plane as opposed to a horizontal plane.

3. Hit “B” to go back.
4. Next, you will need to scroll to each button (A, B, X, & Y) and change the settings (see image below).
- Change X to Y
- Change A to X
- Change B to A
- Change Y to B

Step #4: Save the Settings:
1. Once all the buttons are mapped correctly, press “Done” to exit the screen (see picture below).

2. Scroll down to “Save mapping” (see picture below).

3. Select one of the slots to save the button mapping under (1-5) (see picture below).

4. Return to the Home Screen. Your Joy-Con should now work vertically with the original button layout!!! You can reset and reload the settings anytime as long as you saved the button layout in one of the save slots.

Step #5: Play!!!
Use the controller and confirm that each button is working the way you would like. The left Joy-Con can also be remapped (see the image below), but it does not work as well in the system menus.

There are so many ways you can reconfigure the Joy-Cons to suit your gaming needs. You may have to use trial and error between different controller modes and buttons options. For example, players may need to remap buttons to their bumpers or triggers so they can use the joystick and the buttons at the same time. Feel free to email me or leave a comment if you have any questions or suggestions about one-handed play on the Nintendo Switch!
For more information, watch Part 1 and Part 2 of my Nintendo Switch Review on YouTube:
Part 1: https://youtu.be/x5q2d8WVujM
Part 2: https://youtu.be/qKArngiNE2c
This post was written during my clinical doctorate capstone experience at the University of Central Arkansas.
